Technique: Molding filled chocolates
- ericochocolatier
- May 27, 2024
- 2 min read
Making filled chocolates isn't that rocket science! In addition, use fresh, high-quality ingredients and you will make chocolates as tasty as those offered by the great chocolatiers. You can buy filled chocolate molds in baking supply stores. Thermoformed plastic molds are very affordable and give good results.
Here is the basic technique for making molded filled chocolates:
Required accessories:
Clean and dry filled chocolate molds
Suspicious
Bowl (as wide as the mold)
Long metal spatula (as long as the width of the mold)
Pastry bag and round nozzle of approximately 5 to 10 mm depending on the texture of the recipe to be filled
Waxed paper on work surface
Ingredients:
500 to 1000 gr. Quality couverture chocolate*
Preparation:
Bring the chocolate to the point (see the recipe Tempering chocolate );
Using the ladle, fill the cavities with chocolate;
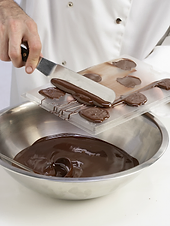
Remove excess chocolate from the mold with the spatula;
Lightly tap the mold on the counter about ten times to release the air bubbles trapped in the cavities;
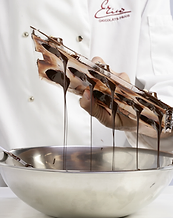
Invert the mold over the bowl and empty the cavities by tapping the side of the mold.
Leave a uniform layer of approximately 2 to 3 mm. chocolate in the cavities;
Place the mold, cavities side down, on the waxed paper-lined work surface;
Once the chocolate is slightly set, scrape the mold with the spatula to remove the excess;
Harden the chocolate in the refrigerator for 5 minutes;
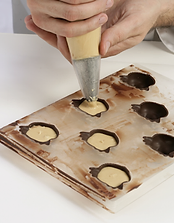
Using the pastry bag, fill the mold 4/5 of the way with your tempered indoor recipe (maximum 30°C)
Place in the refrigerator to set the inside;
If the molds are cold, let them cool before sealing the cavities;
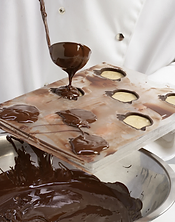
Using the ladle, pour chocolate over the cavities to seal them and remove the excess with the spatula;
Cool and unmold.
* To make work easier and to keep the chocolate in point longer, you should use more chocolate than is required to fill the molds. When the chocolates are finished, pour the remaining couverture chocolate into a plastic container. It can be used for other recipes.


Comments